How to get all of your clients in Ignition and collect payments

Please note: This guide assumes that you have connected your accounting ledger of choice, Xero or QuickBooks. Please follow the instructions to connect your ledger before proceeding!
Have all your clients in Ignition and the payment gateway set up? Use the new Request Payment Method feature!
Step 1 - Import all of your clients into Ignition
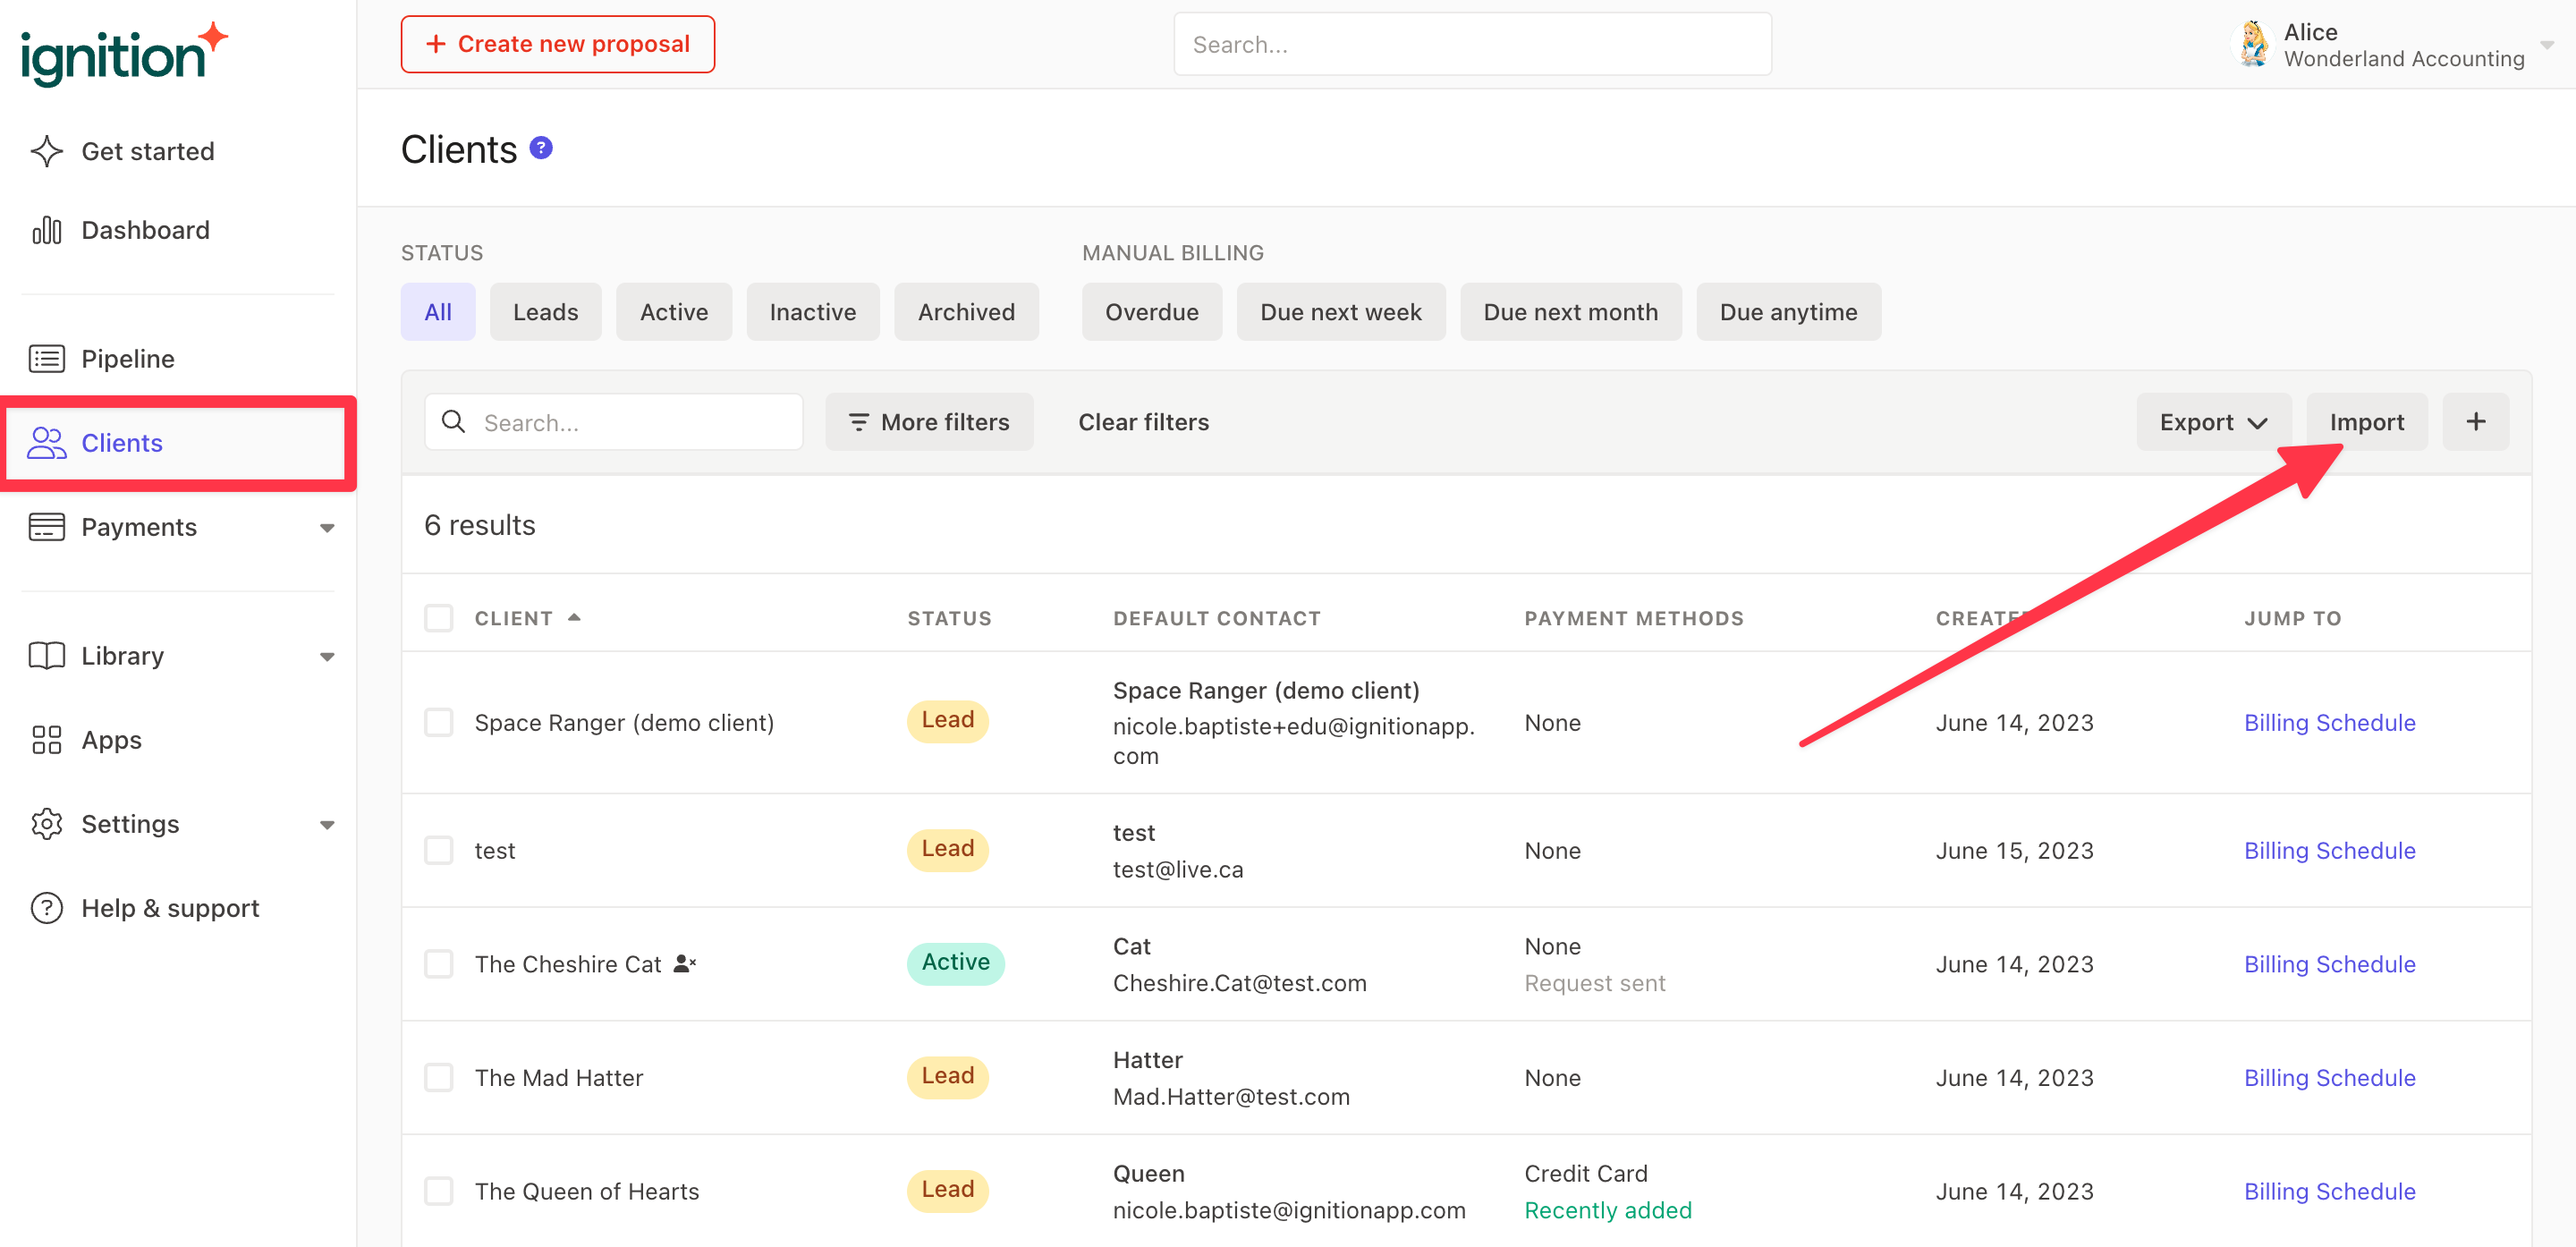
The first step is to import your clients into Ignition to allow you to send proposals in bulk.
Please follow the instructions to import your client list.
This is a great opportunity to clean up and organize your client list. A clean client list ensures that your client list is as up to date as possible and should contain clients that you are currently working with or new clients that you will be working with in the future.
Step 2 - Setup your payments and payment policy
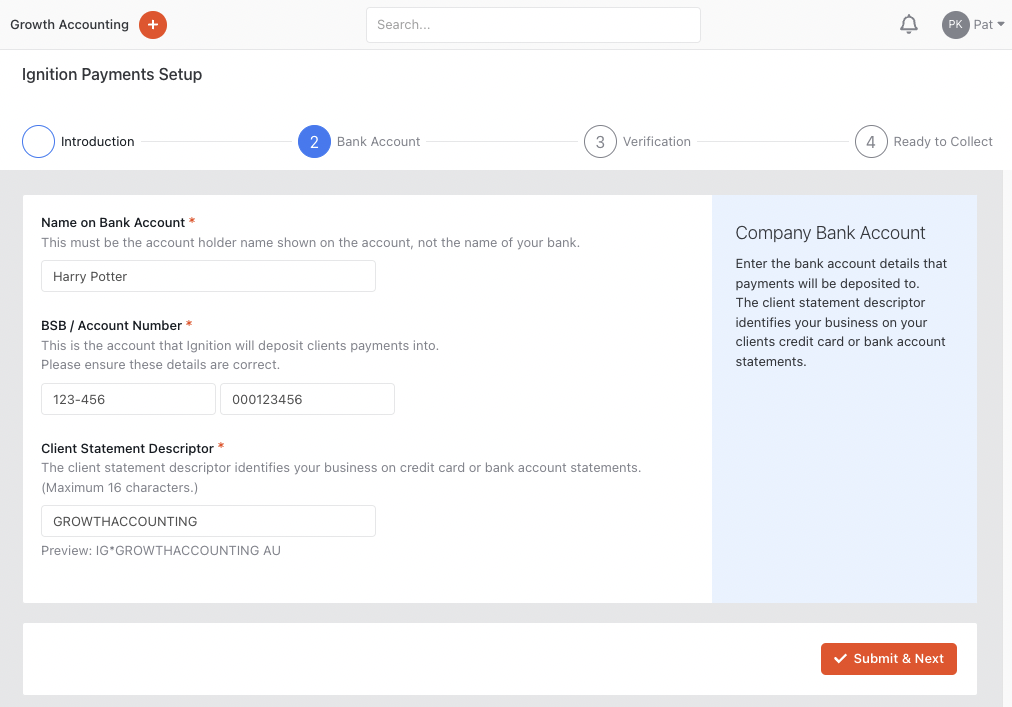
Next, ensure you setup Ignition payments and begin the verification process.
Please follow these steps in your Settings → Payments tab in order to enable Ignition payments.
Please note: If you are setting up Ignition payments for the first time, we’ll need to verify your details which can take up to 3-7 business days, but usually less.
You’ll still be able to collect payments from your clients during this time, so we strongly suggest continuing preparing to get your clients and proposals created in Ignition. Continue following the steps below!
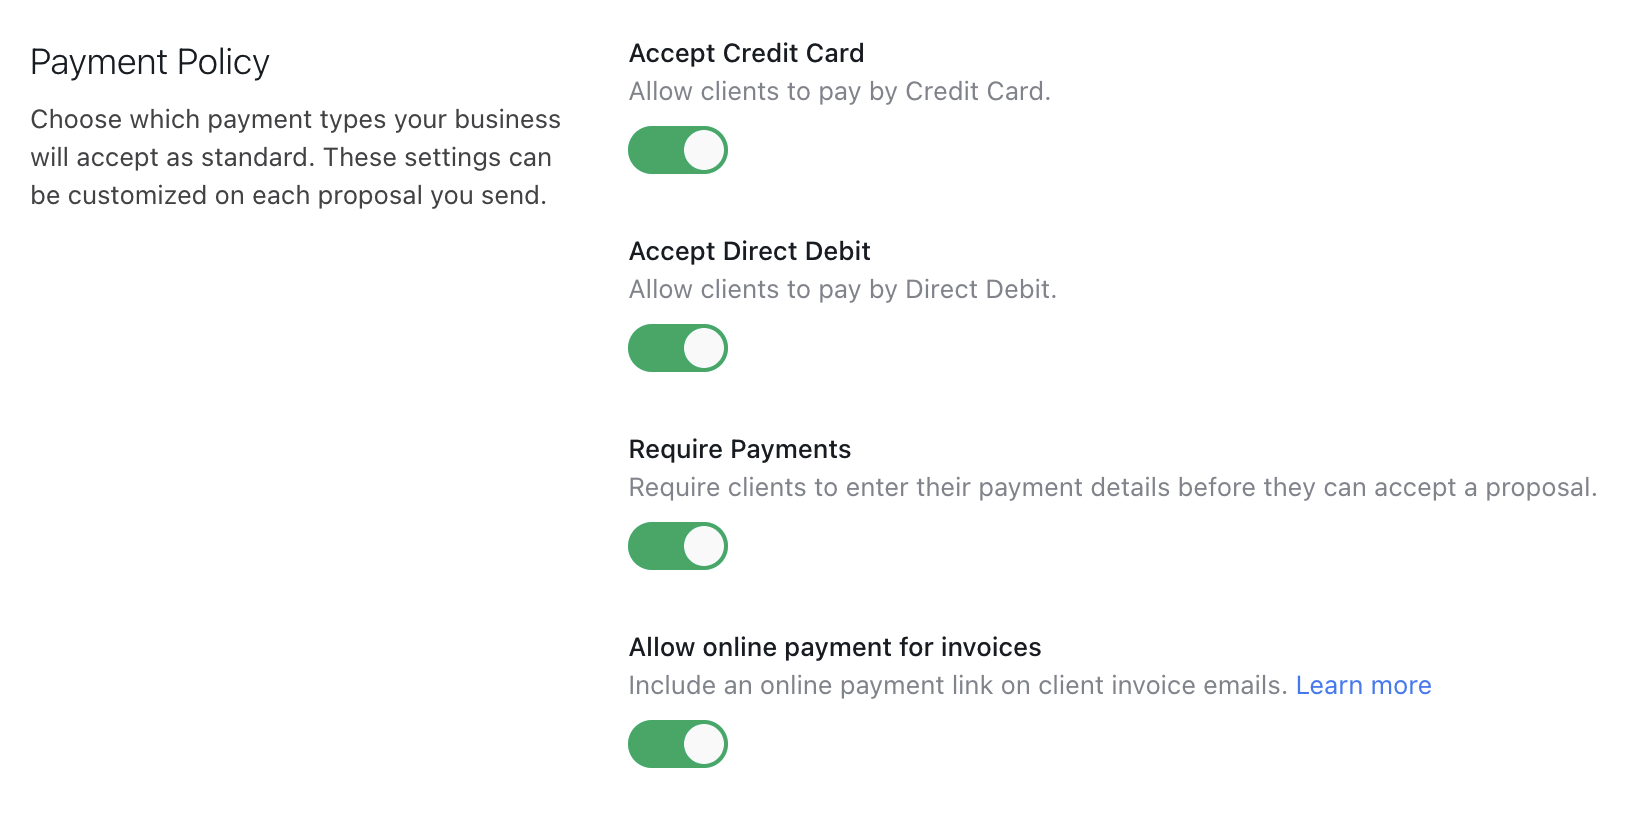
When you are done, set your Payment Policy settings by selecting what payment types you’d like to offer your clients.
These set the default payment settings whenever you create a proposal, but they can be overridden at a proposal level.
We suggest leaving all four toggles on as default to maximize client payment options and to protect your practice against debtors.
Step 3 - Creating custom proposal templates and sending in bulk
We suggest using custom proposal templates in order to create and send proposals if you’re starting from scratch.
Custom proposal templates are a fantastic way to:
Get high-quality proposals sent out faster
Standardize client engagements by creating templates you and your team can use
Simplify your proposals by including your most popular services
Please follow these instructions to create your own custom proposal templates.
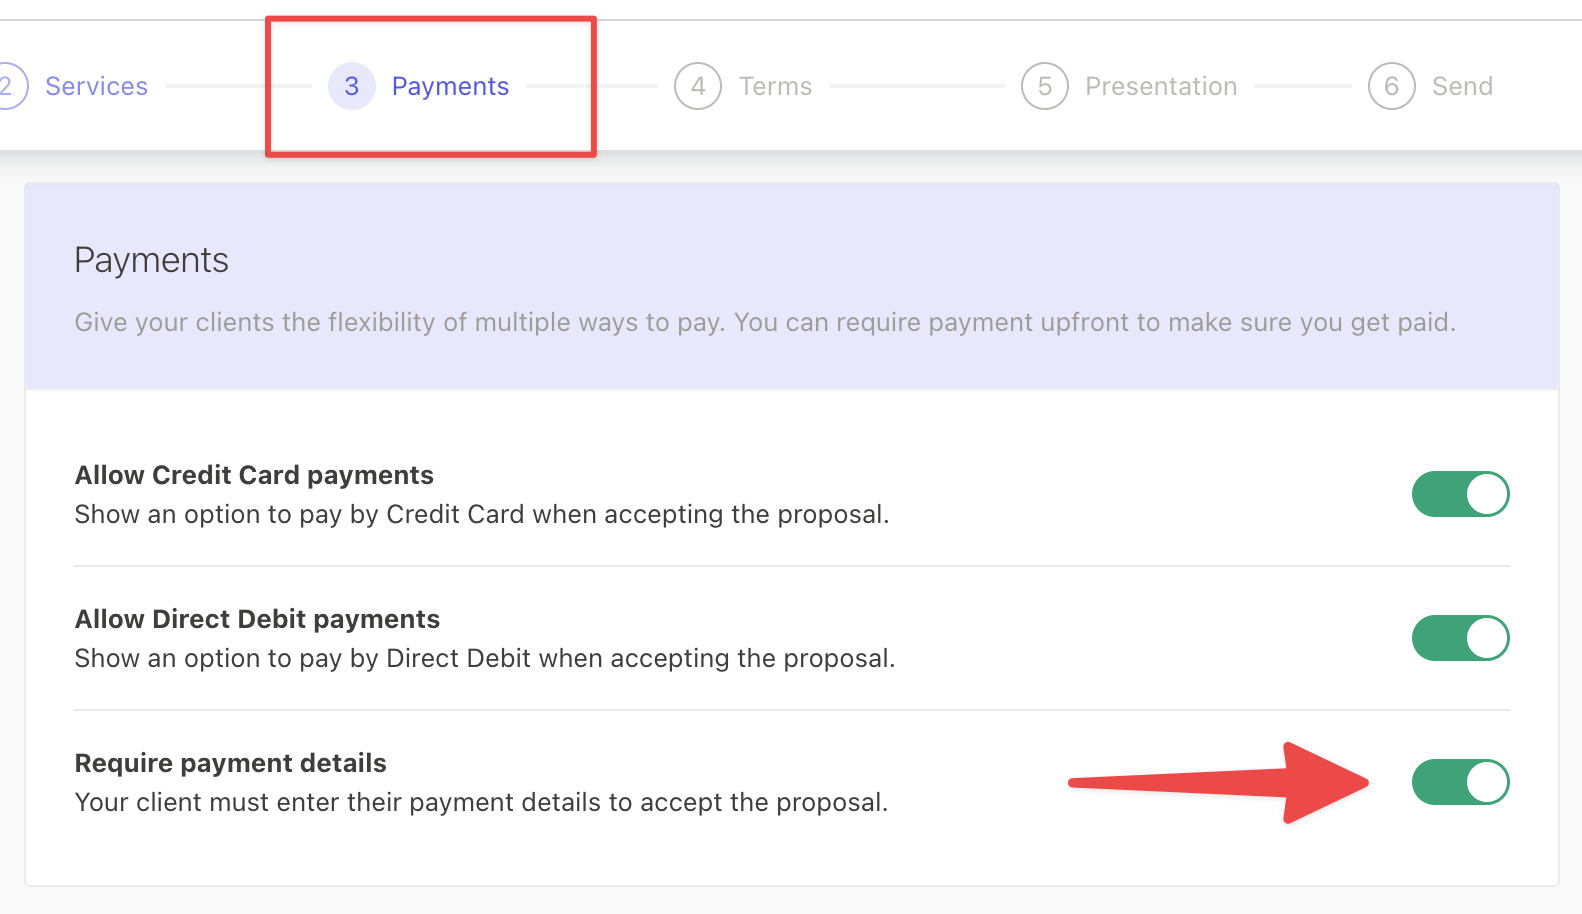
In each of your proposal templates, we strongly recommend that you enable the Require payment details toggle to ensure that you are collecting payment details upfront, to minimize your debtors.
When you have finished creating your proposal templates, you can start creating proposals for all of your clients and customize them as you see fit.
Alternatively, see the next section about our bulk proposal creation process if you have more than 20 proposals that you need to send out.
When you have created all of your proposals, you can either send them one by one or you can send them in bulk.
Once you have sent your proposals, we suggest using your Pipeline tab to follow up on your clients who haven’t accepted yet.
We suggest doing this regularly to ensure that your entire client base is covered.
Step 3 (Alternative) - Performing a bulk proposal creation and send in bulk
If you have more than 20 proposals to send, we suggest following these instructions to create proposals in bulk.
This process uses custom proposal templates as well as a CSV file to organize which client will receive which proposal across your entire client base.
Our team will then create these draft proposals for you once you send the file to us. You can always edit and customize these proposals further before sending in bulk.
Step 4 - Collecting payments on existing Ignition proposals
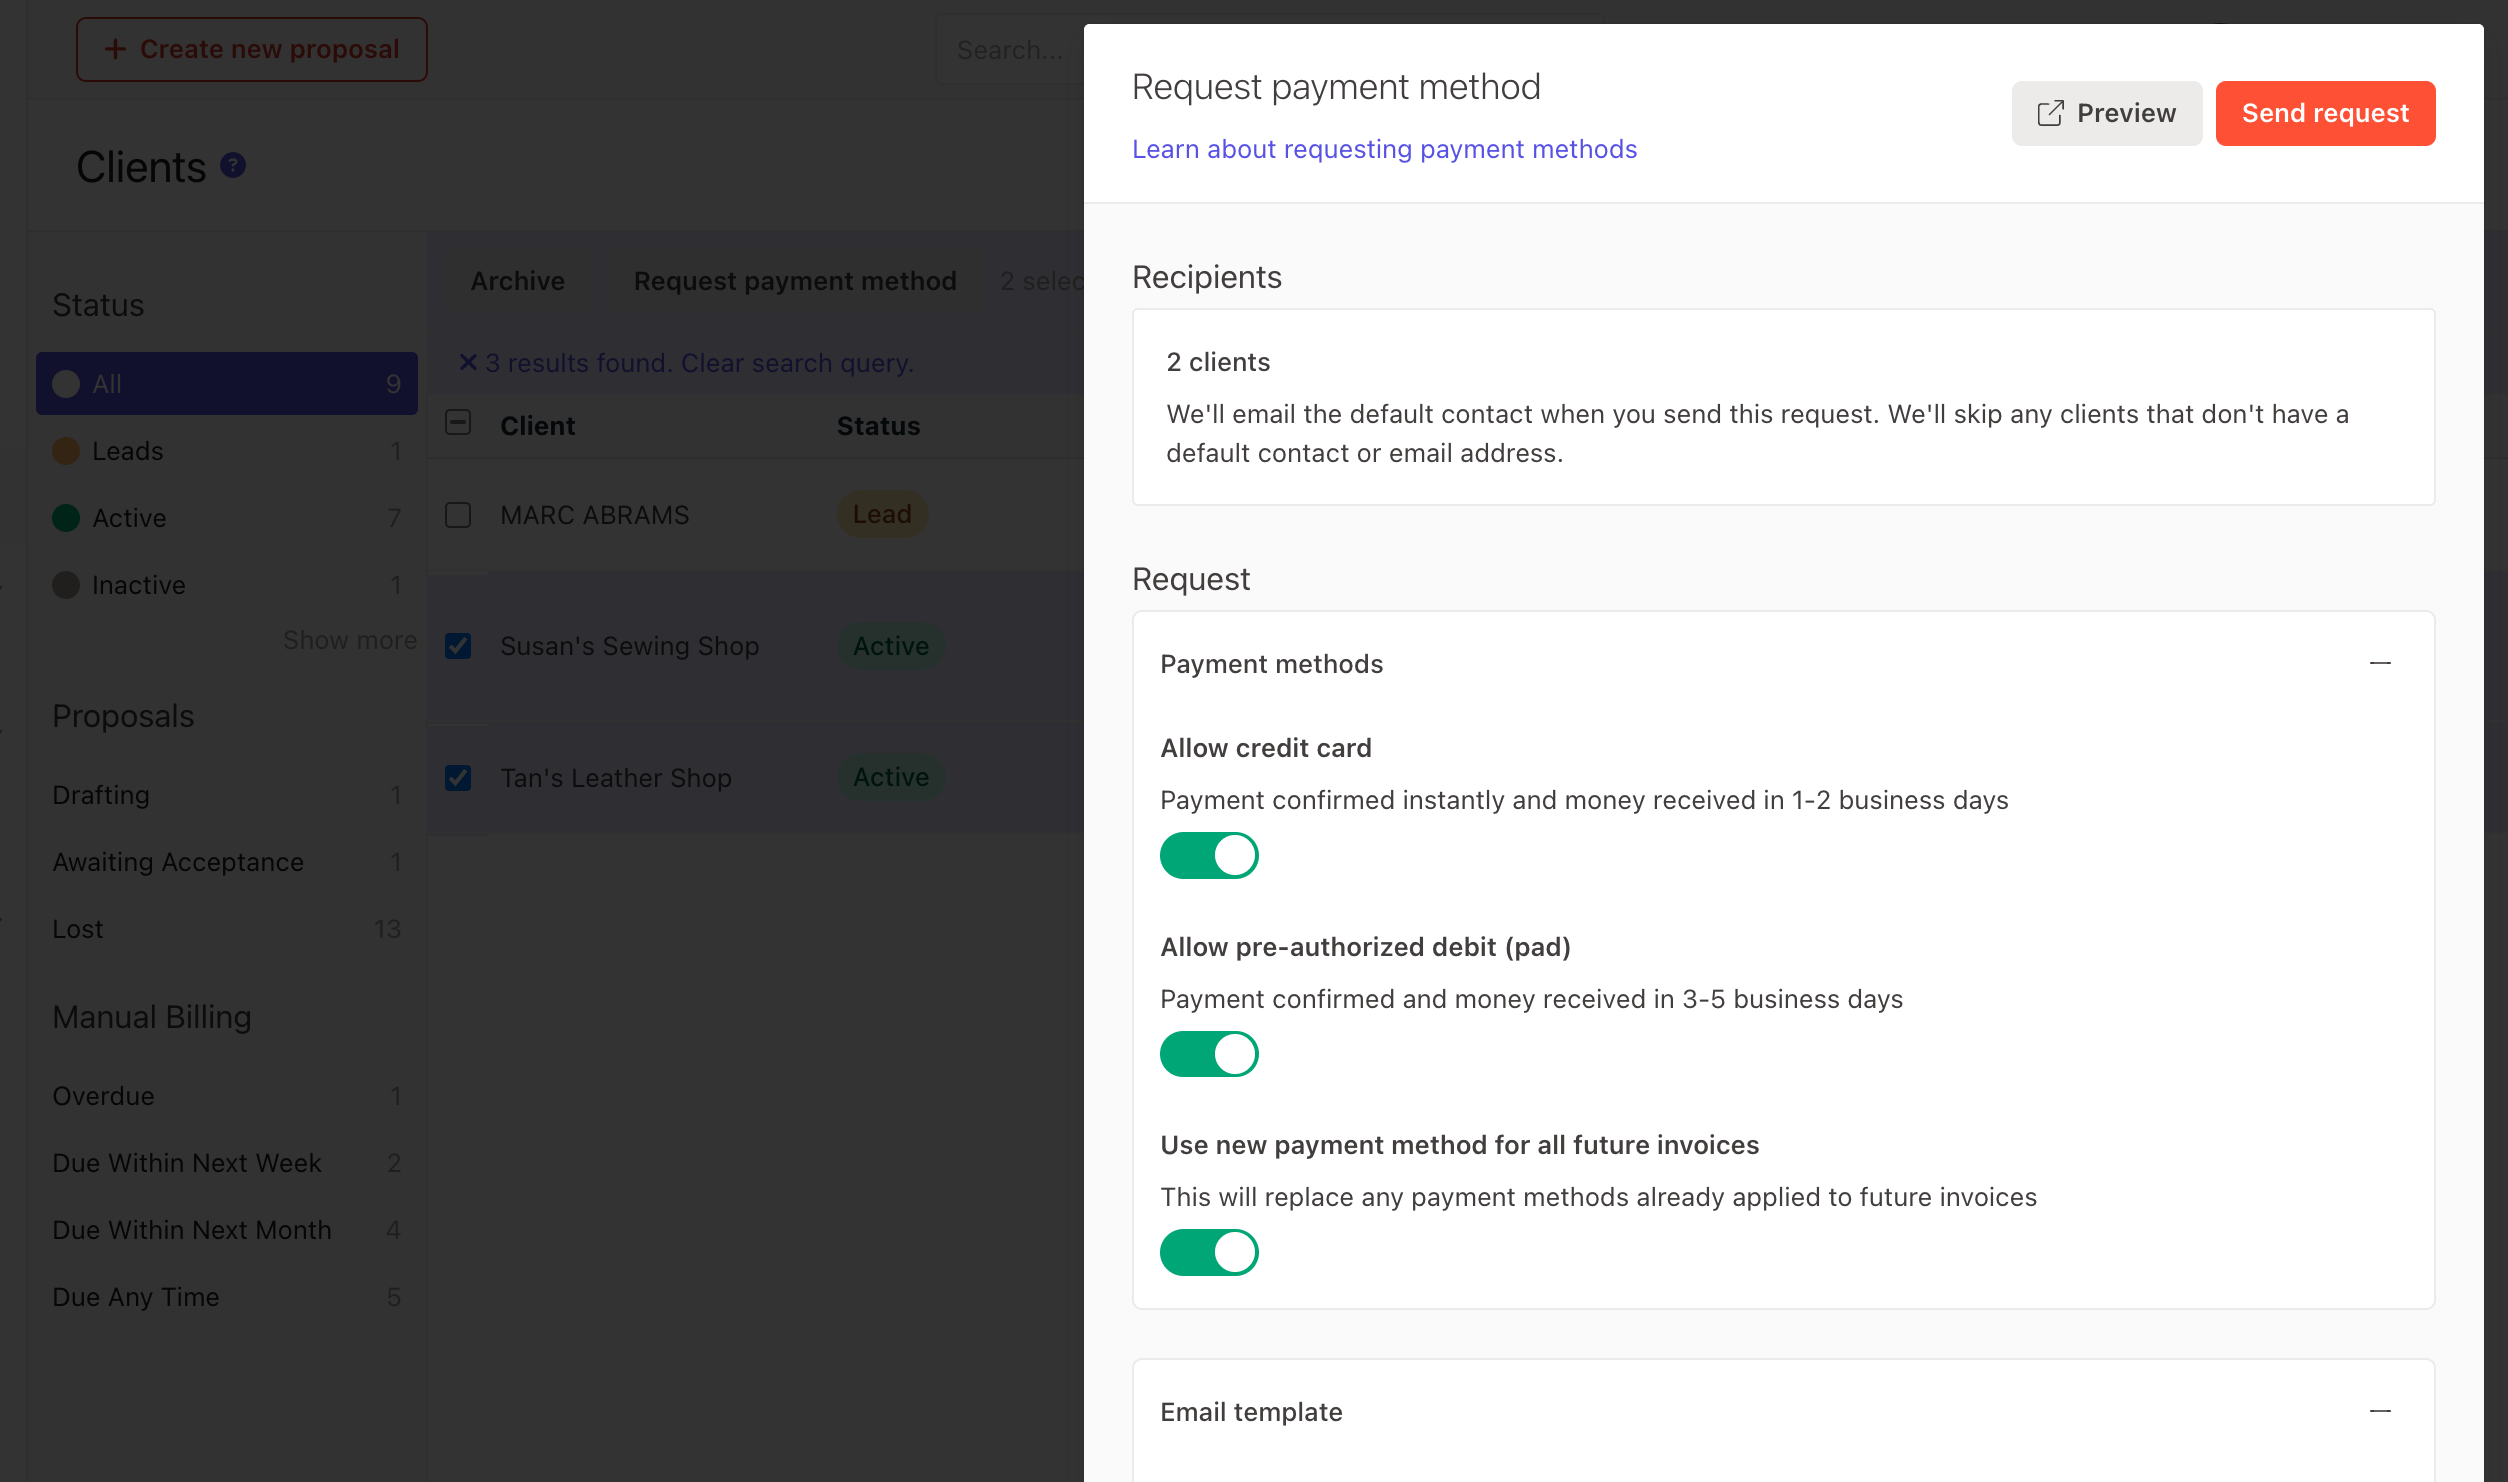
If you have any existing clients that currently aren’t paying via Ignition payments, we strongly recommend that you request payment details once your Ignition payments is set up.
Please follow these instructions to migrate your existing client payments to Ignition in bulk.
This process takes advantage of Ignition’s feature to request payment methods in bulk in order to collect payment details. You can also track your sent requests with this process to cover any tardy clients and then enable the new payment method for future billing once it’s captured.
Step 5 - Locating overdue invoices and invoicing them
When you have Ignition payments set up, you can also begin collecting for your overdue invoices.
Navigate to your Clients tab and click the Overdue filter under the Manual Billing section.
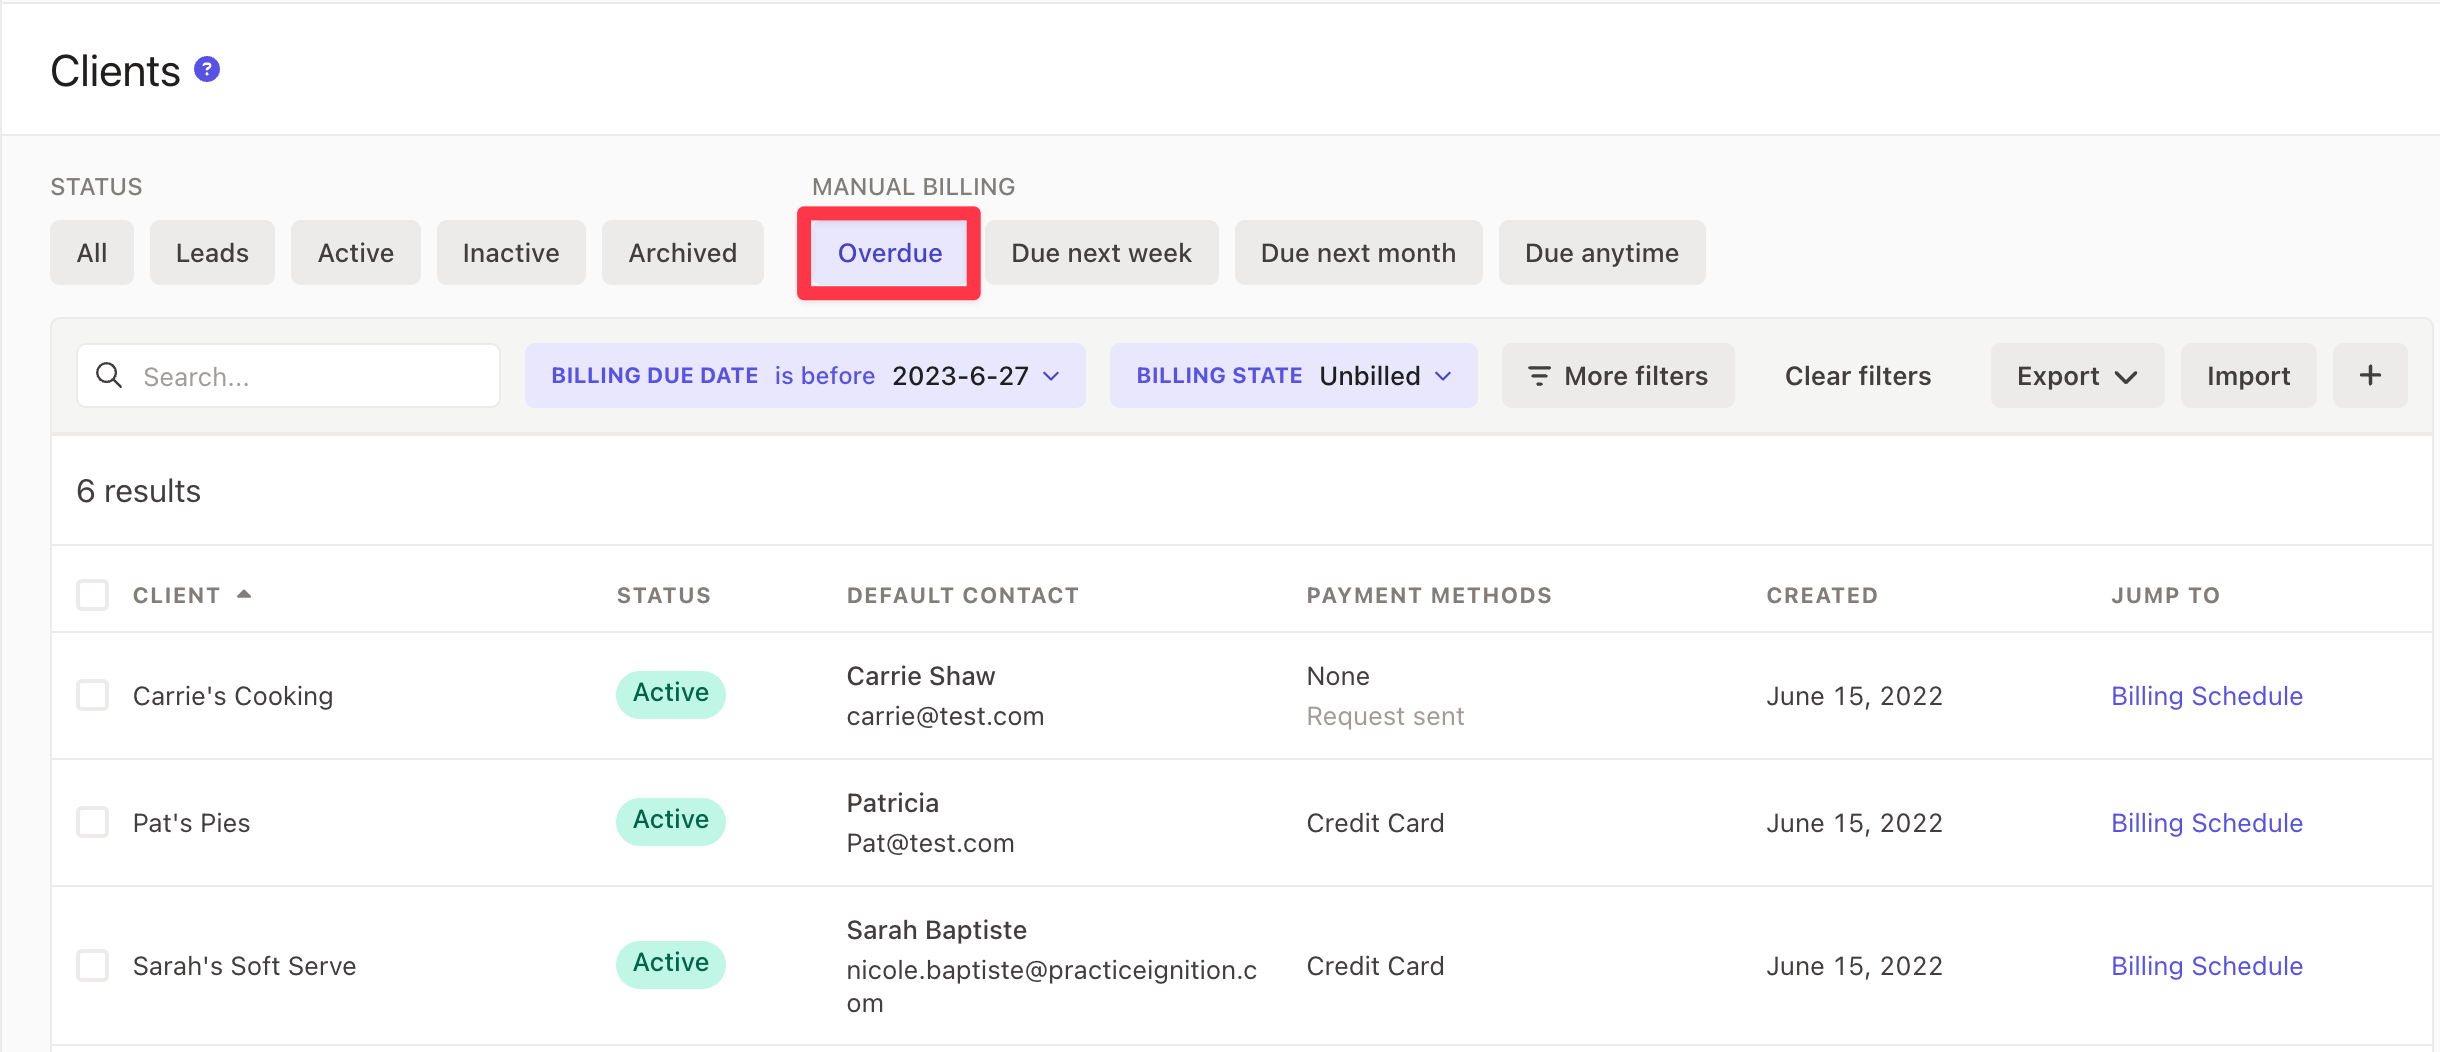
This allows you to view all clients with outstanding manual billings (either on completion or variable/estimate prices) that are overdue.
You can then navigate to each client’s Billing Schedule tab and invoice the overdue billing items.
